The electric wiring and system of your Alfa
Romeo sometimes causes problems. When the battery is dead or
almost, a cheap and reliable instrument will help you to
prevent it from happening again.
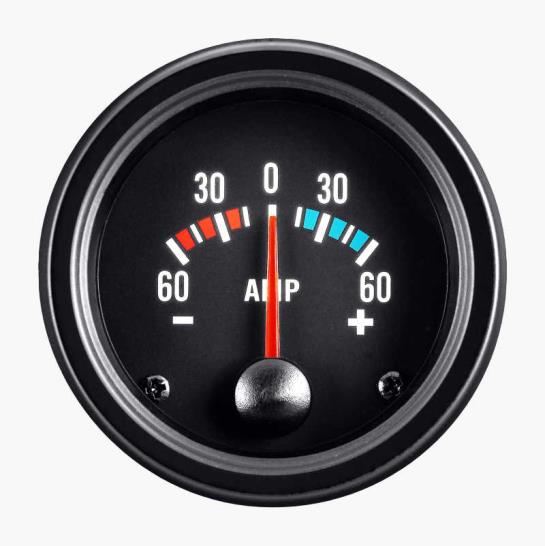
The ammeter is a reasonable investment, since it will tell the
driver instantly what is going on with the battery. In fact,
it will tell you how much electricity the alternator
transports to the battery, or even worse, if the electricity
is draining your the battery.
When the gauge is pointing at zero or preferably somewhat in
the positive sector you have an indication that everything is
OK. When the needle turns over to the negative sector, you are
most likely to end up with a dead battery and it's time to
check the alternator and the electrical system. Besides, the
ammeter will tell you how far the battery will last before it
is completely dead. If your battery has a 60 AH and your
ammeter is showing negative 10 am, you might probably have
some five to six hours to go. Most ammeters indicate +/- 50 A
and are low-priced. You will also need some cable and
contacts. Please note, that the cable must be dimensioned for
30-40 A, so get a solid and thick one or you might end up with
a shortcut.
When you connect the alternator/generator, control (regulator)
box and battery, check the wiring diagrams for your model.
Always disconnect the battery before tampering with the wires!
1750 GT Veloce and Spider Veloce have the B+ from the
alternator going direct to the + on the battery. From the
battery there is a most thick cable to the starter. This cable
is then connected to the fuse box and the main electric
system. To get the ammeter to tell you everything about your
electrical system, you will have to make a minor modification.
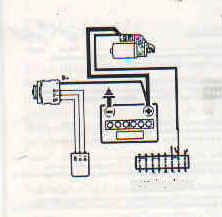
The original wiring diagram
Disconnect the cable from the alternator B+ and the battery
and replace it with a longer one and connect this to the fuse
box and the original (red) cable. Then connect the ammeter to
the cable from the starter to the fuse box.
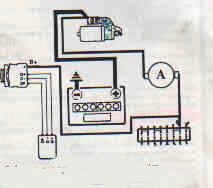
The modified
wiring diagram
1750 Berlina etc. Slightly modifications needed. As usual, the
B+ from the alternator leads direct to the + on the battery.
The fuse box is supplied from the B+ on the alternator and I
have modified this as shown.
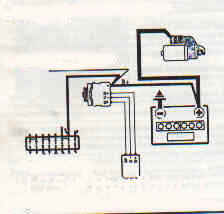
The original wiring diagram
Some GTV cars in the 105-series has the same type of wiring
diagram.
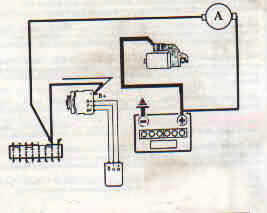
The modified 1750 Berlina wiring diagram
2000 Berlina etc. The horn has its own cable, an Italian
specialty. Whatever happens, blow your horn and be happy.
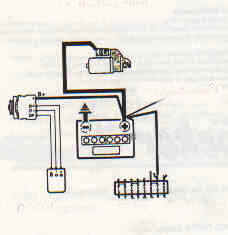
The original wiring diagram
The proposed wiring does not register the horn consumption on
the ammeter. No need to overdo it.
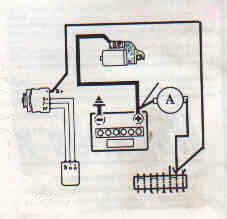
The modified 2000 Berlina wiring diagram
1600 Duetto and Giulas with generator (dynamo). The cars with
the older types of generators perhaps need a better
supervising of the control box.
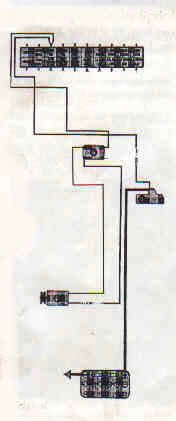
The original wiring diagram
All electricity goes through the control box on cars with
generators, which makes the wiring easy.
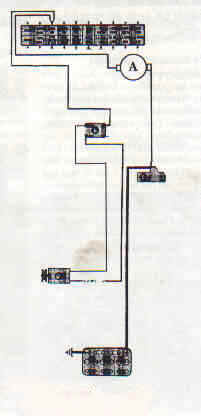
The modified 1600 Duetto wiring diagram
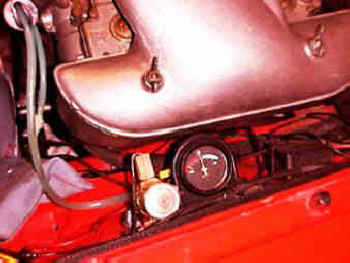
Finally, where do you place the instrument? Well, since I do
not want to spoil the original interior of my Round tail, I
have placed the ammeter in the engine bay where it is easy to
read when I check the engine. Good luck!